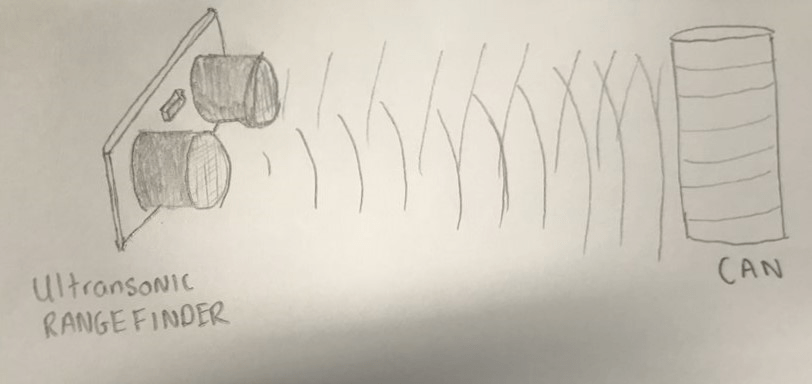
Featured

Week 7

When one door closes another door opens‘ this saying definitely applies to the Robo Sumo project in T.U Dublin engineering. After successfully completing the ‘Tip the Can’ challenge all focus was directed towards the competition battle. We discussed our ideas about what features we wanted our robot to had for week 10. We decided that we would have a large bummer/ driver to push off the opposition robot. In the sketch below shows a rough example of what we proposed to do. The switch was to be behind the bumper.

Image.jpeg

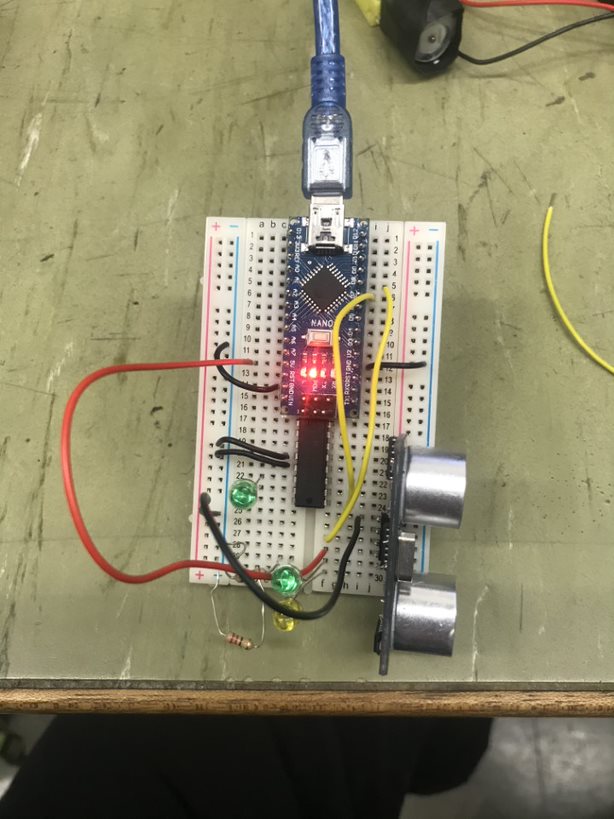
We added an extra 6V battery pack to increase the voltage and power going to the motors.I re built the robot to change the motors back to the faulty one to see if we could resolve the problem and we also tested the voltage in the battery and found out that the first battery pack was only producing 3 volts. We changed the battery’s and tried again with the motor but the motor would only respond for the first couple of seconds from being powered on.

Due to the closer of the college we did not get to complete our project. Our proposed design for the aluminium bumper that I was to create never got constructed and we feel as the project was progressing we were coming together as a team more and working well as an individuals and as a part of a team. Personally at the start of the project I had no knowledge of coding , but I felt I contributed in the construction of the of the robot and the soldering of the wires as this was an area I was familiar with and confident in. Even though i was not the main group member writing the code I felt that I was learning from David and understanding the steps.

Featured

Week 6

After a failed attempt at the ‘ Tip the Can’ and a week of trying to figure out what went wrong on the day we were ready to attempt the challenge again. It was the motors were damaged and we were unsure if it was a soldering error or a faulty right motor but we switched out the motors. Luckily there was spare motors that fitted our body of the robot that we were able to use. After some tweaking of the code and setting the range finder distance to a smaller distance so it would only pick up the can.

We built the robot shortened a few wires to make the robot more compact and within the length and height restrictions. We headed to the lab and after a few trial runs we were ready to have a time recorded. Our first recorded attempt did not go to plan but we were much more successful and recorded a time. We placed 12th according to the spreadsheet with a time of 12.15.

We were happy with our time but there was plenty of room to improve and to make our robot quicker for the tournament. I think we worked quite well as a team as the project went on and especially when fixing the robot for the challenge.

Below I have embedded a video of our tip the can challenge:

Featured

Week 5

This was the week of the ‘Tip the Can’ challenge. To be successful in this challenge we first had to get our robot to turn, using the rangefinder find the can. Drive towards the can, touch it and reverse back. For it to be a valid result we had to meet a criteria: green light on the can and dimensions to be 100mmx100mm and the weight less than 500 grams.

From the work we carried out in week four building the robot the final part was to solder the motors. Our motors were smaller than most of the other teams and we thought we this gave us and advantage as our robot was more compact. Another characteristic which we liked about the robot is that it has a low center of gravity which is important for the robo sumo competition as it will not be pushed off easily.

We placed the motors in the body and assembled the robot. When we turned the battery’s on our robot was not moving and we realized we had a made a mistake along the way. We found that the solder had broke off in one of the motors and the small hoop had broken off too. I had to leave this lab early on medical grounds , but i was informed from my team members that we were unsuccessful in completing the Tip the can challenge in our first attempt.

Featured

Week 4

This was the week before the the tip the can. We had just finished off our code which we think was correct for the ‘tipping the can’. Together we decided over previous weeks what type of body we wanted for our robot. We found a body with tracks on it and motors to fit the body. This week our parts arrived and we began to build our robot. The motors we bought were a lot smaller than the ones we were provided with for the project. The motors were N20 Series Micro metal gearmotor 298:1.

Unfortunately we did not have our motors with us this week and we only could work on our body of the robot and tiding up our wiring to get ready for next week. We also measured our robot to make sure it was within 100mm x 100mm which it was.

2586_large_micro_metal_gearmotor_298_to_1
N20 Series Micro metal gearmotor 298:1.
2582_large_zumo_chassis_kit_no_motors
Robot Body
Featured

Week 3

This week we made more progress towards our tip the can challenge. We looked at the programming the HC-SR04 ulstrasonic rangefinder this week. From Ted’s lecture we learned how the rangefinder works. The rangefinder has two main parts an emitter and a detector. The rangefinder emits sound waves out and once it hits and object in reflects them back towards the rangefinder as shown in my sketch below. Along with knowing the basic functions of the rangefinder we also had to know how to create a code so that the rangefinder would only emit sound waves for a certain distance.

Upon being succesful with the code we inputted a red L.E.D in the circuit to test our code out. Once our rangefinder came into contact a red L.E.D would light up showing that the waves had found an object. We coded the Arduino so that if distance ‘ if distance <50cm , Red L.E.D on’.

As a group we looked online individually at a body for thr bot. we decided that we would look at something with tracks as it has a low centre of gravity and in the battle it would be hard to push off the ring.

Rangefinder Sketch
rangefinder in circuit
Featured

Week 2

After completing the L.E.D flash challenge successfully last week, we were assigned with a new task regarding our actual robot. Our aim for weeks 2-5 is to prepare our robot for tip the can.This week we looked into how to code the Arduino to power the motors in the robot. Firstly we soldered the yellow wires onto the motors, and wrapped some black tape around to ensure the wires and solder would not break.

After inputting the code using the Arduino we tested it out. To do this we built in L.E.Ds into the circuit to show the forward and backwards movement of the motors. We recorded a video of this which is embedded below. We successfully programmed the motors to our specific desire.

Our next task we undertook was incorporating the rangefinder into the code and the circuit. We began reading Ted’s cookbook about the rangefinder and how it works. I feel we made good progress on our project this week.

Motors
Featured

Week 1

This was our first week attempting the Robo Sumo project. Firstly we were assigned with the L.E.D blink test in our lab after being briefed. We were given our breadboard, Arduino , L.E.D and resistors to build our circuit. from the previous semester we were familiar with all of the equipment apart from the Arduino.

We built the circuit as shown in the cookbook and step by step learned how to use the Arduino software to programme the Arduino nano. One of our group members copied the code from the cookbook and coded the Arduino. We used the method to calculate our binary number from our group number of 85. We used the method on the cookbook to find our binary number and verified by searching it up online.

We modified our code to create a second digital output pin and extended the circuit to add an additional L.E.D. By transmitting a 1 L.E.D 1 off and L.E.D 2 on and the opposite for a zero.

We encountered some problems with our Arduino at the start but with the guidance of our lecturer we soon figured out what was wrong and found a solution to the problem.

Here are some of the results from the challenege:

L.E.D flash challenge Vallidator
L.E.D Blink test

Design a site like this with WordPress.com
Get started